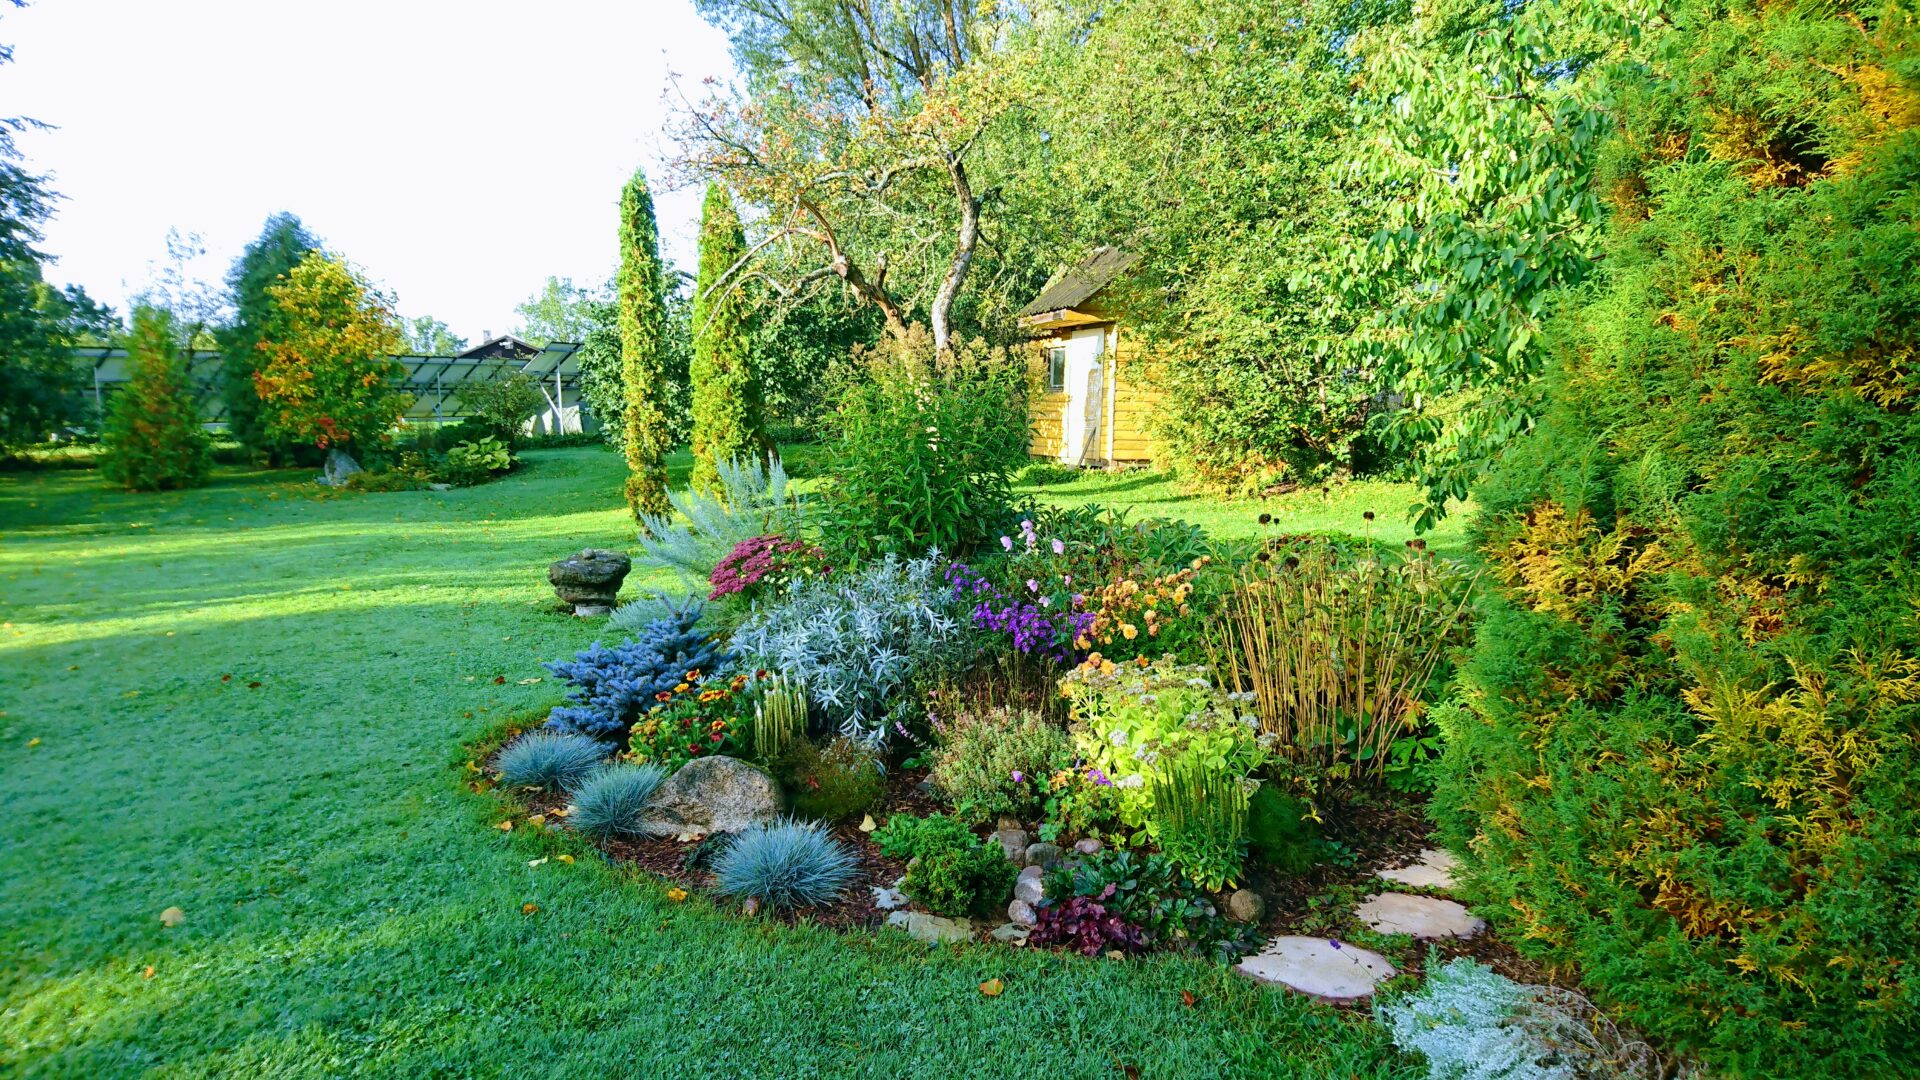
Istutusalade rajamine ja sinna sobivate taimede valimine on paljusid aiaomanikke huvitav teema. Internetiavarustest leiab selle kohta palju kasulikku infot. Kui teemasse korralikult süveneda, võib aga kogu ettevõtmine tunduda aiapidajale liiga töömahukas ja keeruline. Panen siia ritta mõned mõtted laisa aedniku vaatenurgast. Algatuseks olgu kohe öeldud, et kui palju ei jõua, tee natukene. Aegapidi jõuad lõpuks soovitud tulemuseni.
Establishing planting areas and choosing suitable plants for them is an interesting topic for many garden owners. You can find a lot of useful information about this on the Internet. However, if you delve into the topic properly, the whole undertaking may seem too labor-intensive and complicated for the gardener. Here are some thoughts from a lazy gardener’s perspective. Let’s start by saying that if you can’t do much, do a little. Eventually you will reach the desired result.
Plaan, plaan ja veelkord plaan.
Plaan peab kindlasti olema, kasvõi umbkaudnegi. Tore on, kui on täpne ettekujutus sellest, kus ja kuidas miski aias olema peab. Meie puhul on aga aed pidevas arengus. Mõtted ja soovid muutuvad pidevalt. Küll on aga üldjoontes olnud kogu aeg selge, kus need istutusalad olema peaksid. Nende täpne asetus ja kuju selguvad töö käigus.
Tuntud aiakujundajate sõnavõttudest on korduvalt jäänud silma arvamus, et üks suurimaid vigu, mida inimesed aiakujunduses teevad, on istutada üksikuid puid-põõsaid-taimi laiguti murusse. Ja et sellise aia hooldamine on keeruline (õige!). Kord oli artikli juures vale istutuse näidiseks isegi pilt, et tutsakas siin ja tutsakas seal. Tegelikult oli inimene istutamisel arvestanud lihtsalt taimede täissuurusega ja titeolekus taimed tundusid tõesti üksikud olevat. Taimi tundes ja laiemalt vaadates oli aga kõik õige, viie aasta pärast moodustavad nad juba rühma.
Plan, plan and plan again.
There must be a plan, even a rough one. It’s nice to have an exact idea of where and how something should be in the garden. In our case, however, the garden is in constant development. Thoughts and desires are constantly changing. However, in general, it has always been clear where these planting areas should be. Their exact position and shape will become clear during the work.
From the statements of well-known garden designers, the opinion has been repeatedly noticed that one of the biggest mistakes people make in garden design is to plant individual trees-shrubs-plants in patches in the lawn. And that maintaining such a garden is difficult (right!). Once, there was even a picture with the article showing a one plant tuft here and a one tuft there as an example of wrong planting. In fact, when planting, the person had simply taken into account the full size of the plants, and in the baby state, the plants seemed really lonely. However, knowing the plants and looked at them more broadly, everything was right, after five years they already form a group.
kuidas edasi.
Korraliku istutusala rajamise jutt on väga õige, aga… Kui aega napib ja suure istutusala rajamine üle jõu käivana tundub, ei pea sugugi aiailust loobuma. Lihtsalt peab plaan olema, kuidas aed tulevikus välja näha võiks. Olen enda jaoks oma aias paika pannud, kus need voogavad istutusalad olla võiks. Ja siis alustan aktsenttaimede „tutsakatega“. Asja mõte on selles, et rajan neid istutusalasid jupikaupa. Kui parasjagu aega ja tahtmist on, kaevan ja laiendan peenart osade kaupa juurde. Lõpuks saab kahest-kolmest laigukesest kokku üks suurem istutusala.
how to proceed.
The talk of establishing a proper planting area is very true, but… If time is short and the establishment of a large planting area seems overwhelming, you don’t have to give up the beauty of the garden at all. You just have to have a plan for how the garden could look like in the future. I have mapped out for myself in my garden where these flowing planting areas could be. And then I start with accent plants. The point is that I am building these planting areas piecemeal. If there is time and desire, I will dig and expand the bed in parts. In the end, two or three patches become one larger planting area.
Teostus.
Kaevamisest ei pääse. Olen aegade jooksul katsetanud mitmeid variante, aga lõpuks on tulnud ikka labidas võtta ja taimed kõrvalt/alt sissekasvanud murust/umbrohust välja päästa. Kui aega, tahtmist ja vahendeid jätkub, on ilmselt kõige mõistlikum murukamar ära koorida, pinnasest umbrohujuured välja kaevata, uus muld peale panna ja soovitud taimed maha istutada. Kui ei jätku, saab istutusala laiendada jupikaupa mättaid läbi kaevates ja olemasolevale mullale komposti lisades. Sellisel puhul tuleb aga arvestada mullas olevate umbrohuseemnetega. Istutusalade rajamine sel kombel on pikaajalisem töö, aga ei murra konti.
Doing.
There is no escape from digging. I have tested several options over the years, but in the end I still had to use a shovel and rescue the plants from the grass/weeds that had grown in from the side/underneath. If there is enough time, will and means, it is probably the most reasonable to peel off the lawn, dig out the weed roots from the soil, put on new soil and plant the desired plants. If this is not desired, the planting area can be expanded piece by piece by digging through the sods and adding compost to the existing soil. In this case, however, weed seeds in the soil must be taken into account. Establishment of planting areas in this way is a longer-term job, but it does not break bones.
murupiirded.
Aastate jooksul olen selgeks saanud, et murupiirded peenraservades on väga vajalikud. Korraliku servamislabida olemasolul ei tohiks suve jooksul peenraservade ülekäimine suur töö olla. Viimaste kuumade ja kuivade suvede ning meie savimulla puhul on see osutunud keerukaks. Kui servatud mättajupid lihtsalt komposti viia, hakkavad nad esimese vihma korral seal usinasti kasvama. Tuleb kõik kivikõvaks paakunud savikänkrad juurte ümbert lahti kobestada, mis on juba väga vaevanõudev. Niisiis jäävad murupiirded. Olen aastate jooksul pannud peenraservadesse nii juuretõkkekanga ribasid kui plastikust murupiirdeid. Kangast on tüütu paigaldada, lihtsam on plastikust piire läbikaevatud maasse suruda. Küll aga kipuvad talvekülmad esimestel aastatel kevadeks plastikut maast välja kergitama. Kuna kasutan paarikümne sentimeetri kõrgust serva, siis lõikan kevadel väljakerkinud sentimeetri lihtsalt kääridega maha. Ideaalis võiks peenraservas olla murupiire ja tänavakividest ääris, mille peal muruniiduki ratas saaks sõita, siis jääks ära ka peenraservadest muru trimmerdamine. Kõik sõltub aga siinkohal aiaomaniku maitsest ja soovidest.
lawn fence border.
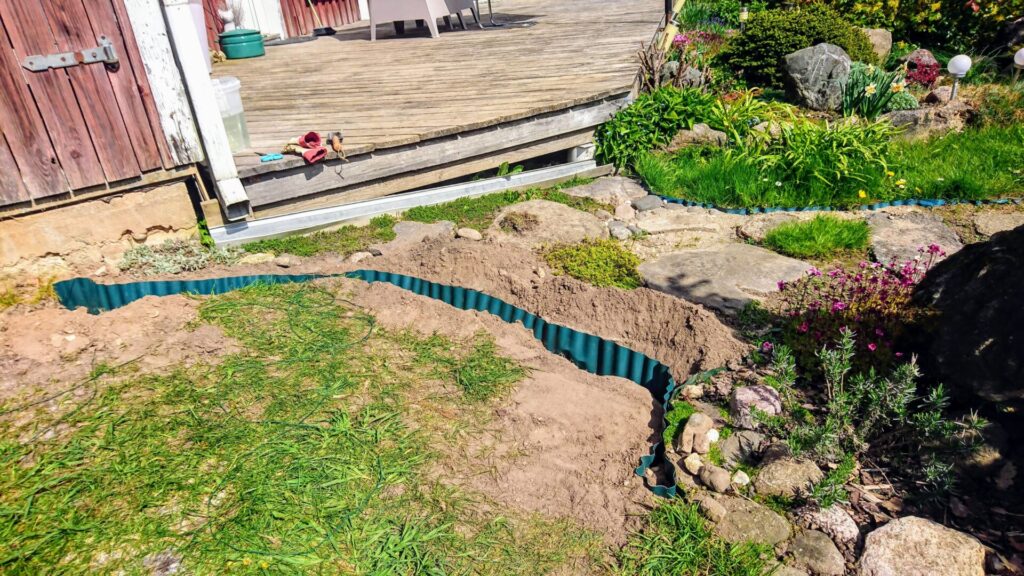
I have learned over the years that grass borders are very necessary. If you have a edging shovel, going over the beds edges during the summer shouldn’t be a big job. With the recent hot and dry summers and our clay soil, this has also proven to be difficult. If the sods are taken to the compost, they will begin to grow there at the first rain. Must have to loosen all the lumps of clay around the roots, which is already very laborious. So the lawn fences.
I have placed both strips of root barrier fabric and plastic lawn fences at the edges of the beds. Fabric is tedious to install, it is easier to push plastic borders into the excavated ground. In the first few years, the winter frosts tend to lift the plastic out of the ground by spring. Since I use a border that is a couple ten of centimeters high, I cut off the emerging centimeter in the spring with scissors. Ideally, the edge of the bed should have grass borders and a street stones, on which the wheel of the lawn mower could drive, then trimming the grass from the edge of the bed would also be avoided. However, everything here depends on wishes of the garden owner.
taimede valimine istutusalale.
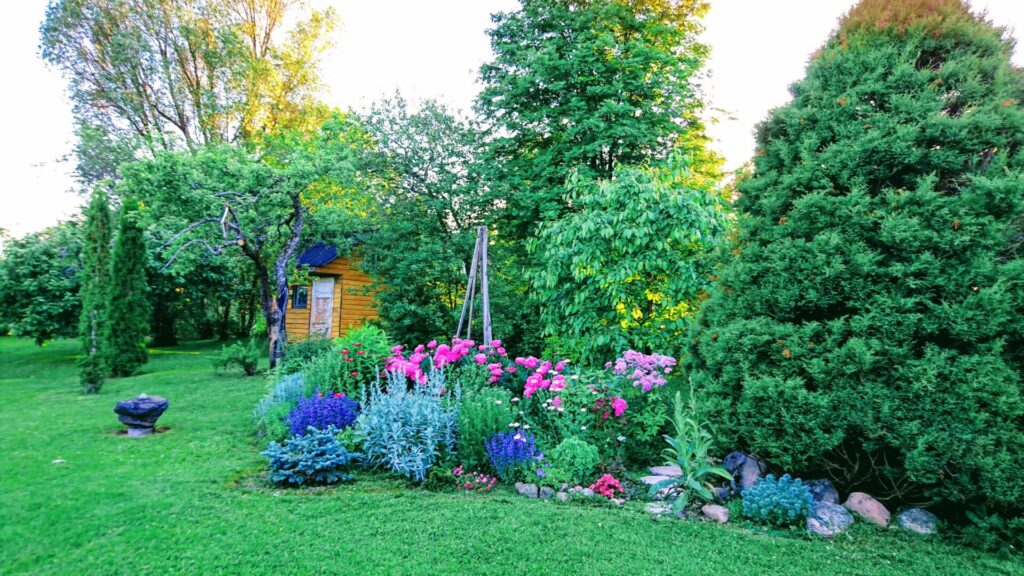
Algatuseks oleks hea teada, milline muld aias on. Ehitusplatsi alt tulnud maa haljastamiseks on ilmselt vaja teha suurem selgitustöö. Ülejäänute puhul aitab märja mulla peos pigistamine ja voolimine ja siis tulemuste kiire googeldamine. Tublimad teevad ka mulla happesuse testi. Sealt edasi saab hakata oma mullale sobivaid taimi valima.
Järgnevaks on kaks varianti: otsida internetist mingi meeldiva istutusala plaan ja vaadata, kas seal mainitud taimed minu aia mullale sobivad. Või teha kusagilt silma jäänud meeldima hakanud taimedest nimekiri, vaadata nende sobivust aiamullaga ja hakata neid ise oma istutusalale sobitama. Mõistlik on jälgida ka taimede kasvunõudeid. Ilmselgelt ei saa istutada sügava juurestikuga taimi kümnesentimeetrise mullakihiga kaetud kõvale aluskivimile, kui pole just soovi kivi lõhkama hakata.
choosing plants for the planting area.
For starters, it would be good to know what kind of soil is in the garden. In order to green the land that came from under the construction site, it is probably necessary to do more explanatory work. For the rest, squeezing and molding wet soil in the palm of your hand and then quickly Googling the results helps. The best ones also do a soil acidity test. From there, you can start choosing plants suitable for your soil.
Next, there are two options: look for a plan of a pleasant planting area on the Internet and see if the plants mentioned there are suitable for the soil of my garden. Or make a list of plants you’ve caught your eye somewhere, check their compatibility with the garden soil and start matching them to your planting area yourself. It is also reasonable to observe the growth requirements of the plants. Obviously, you can’t plant plants with a deep root system on hard bedrock covered with a ten-centimeter layer of soil, unless you want to start blasting the rock.
taimede kasvunõuded.
Taimede kasvunõuded on olulised, et taimed aias ise hakkama saaksid ja pidevat poputamist ei nõuaks. Internetist ja aiaraamatutest saadavale infole tuleb aga terve talupojamõistusega otsa vaadata. Lugesin hiljaaegu üht proffessionaali kirjutatud aiaraamatut aktsenttaimedest. Peaaegu kõigi taimede juures oli kirjas, et vajavad kasvuperioodil korrapärast väetamist. Lugesin ja mõtlesin, et ma ei taha neist ühtki, sest ei viitsi suvi otsa väetisekottidega mööda aeda joosta.
Noh, mul on vähemalt pooled neist taimedest aastaid olemas ja nad on ilma väetamata väga ilusad. Võibolla oleksid nad väetist saanutena veelgi ilusamad ja võimsamad, aga… Ei tasu meeldima hakanud taimi seepärast veel välja praakida, et kusagil on kirjas, et neile on vaja seda-teist-kolmandat. Eriti kehtib see vanade taluaia taimede puhul, kes on vahel aastakümneid võssakasvanud aladel kõigest hoolimata ellu jäänud. Ei vaidlusta väetamisvajadust nn ülearetatud rühmapüsikute puhul, aga tavalise keskmise aiamulla puhul tasub vaadata, mis ümbruskonnas hästi kasvab ja selle abil oma valikuid teha.
plant growth requirements.
The growth requirements of the plants are important so that the plants can manage themselves in the garden and do not require constant pampering. However, the information available from the Internet and garden books must be looked at with common sense. I recently read a garden book written by a professional about accent plants. It was written on almost all plants that they need regular fertilization during the growing season. I read and thought that I don’t want one of them because I don’t want to run around the garden with bags of fertilizer all summer.
Well, I’ve had at least half of these plants for years and they are very pretty without fertilizer. Maybe they would be even more beautiful and powerful if they had received fertilizer, but… It’s not worth cull out plants that you’ve started to like, just because it’s written somewhere that they need this-second-third. This is especially true for old farm garden plants, which have sometimes survived despite everything in overgrown areas for decades. I do not dispute the need for fertilization in the case of so-called overbred group perennials, but in the case of ordinary average garden soil, it is worth looking at what grows well in the surrounding area and using this to make your choices.
Multšimine.
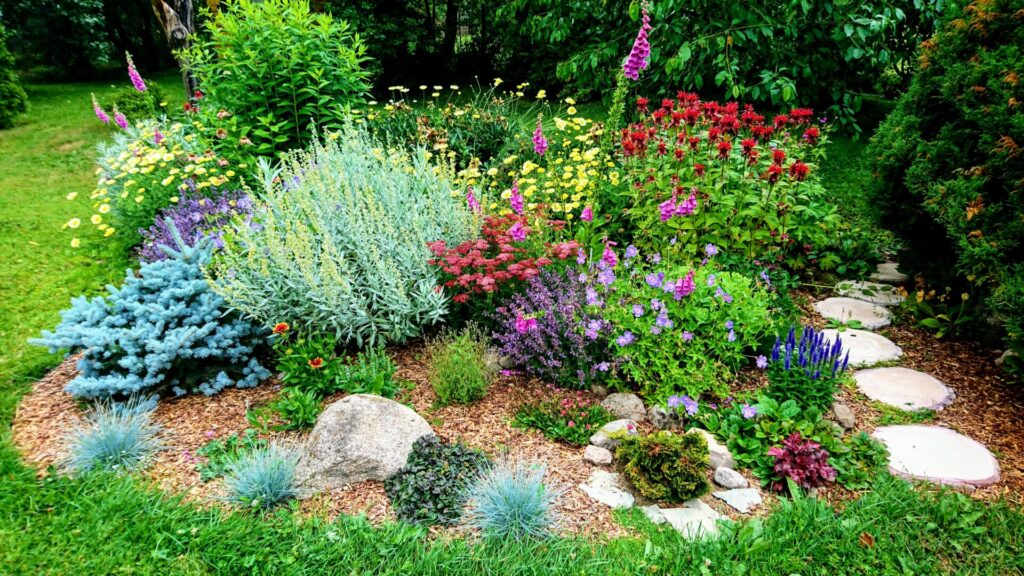
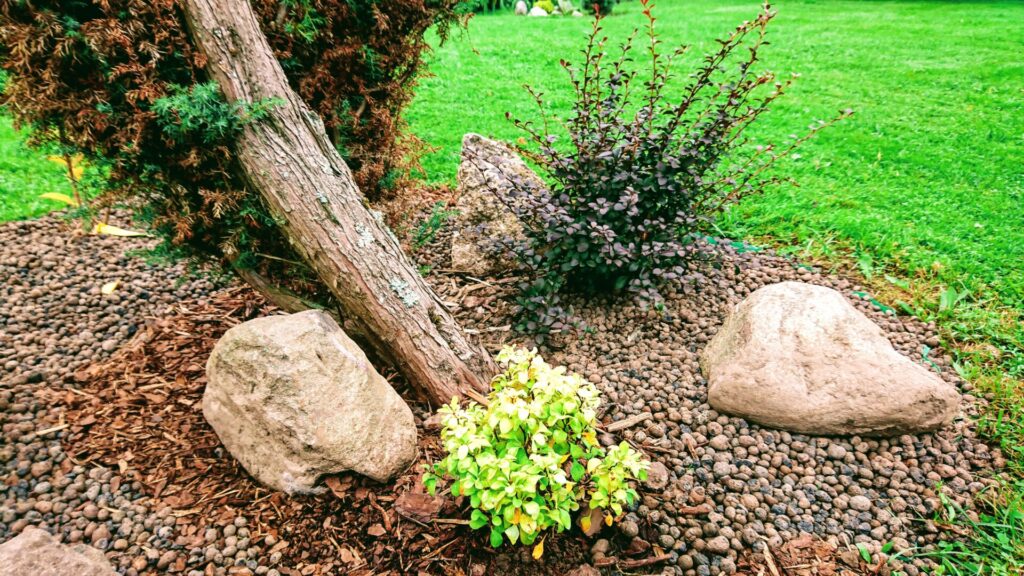
Istutusalade hooldusvajadust vähendab multšimine. Täiskasvanud istutusalal varjavad taimed mullapinna ära ja umbrohtudel pole ruumi kasvada. Isiklikult olen seda aastaid praktiseerinud ja korralikult juurumbrohtudest puhtaks tehtud aladel on rohimisvajadus minimaalne. Aga on alasid, kus tahaks, et taimed või aiakujunduselemendid tühjemal pinnal selgemalt eristuksid ja seal peaks pinda millegagi katma. Samuti ei kuivata päike ja tuul multšitud aladel pinnast nii kiiresti.
Peenrakanga all kipub pinnas liigselt tihenema, istutusavade suurust peab taimede kasvades pidevalt kontrollima, samuti on kanga all tigudele hea koht paljunemiseks. Peenrakangast kasutaksin ainult käiguteede multši alla. Istutusalade multšimiseks olen kasutanud nii paksule ajalehekihile laotatud kergkruusa kui ka mullapinnale laotatud peent männikooremultši. Mõlemad variandid on end aastatega õigustanud, kuigi männikooremultši peab aeg-ajalt juurde lisama, ka tekitab see lagunedes huumust juurde.
Mulching.
Mulching reduces the need for maintenance of planting areas. In a mature planting area, the plants hide the soil surface and there is no room for weeds to grow. Personally, I have practiced this for years, and in areas that have been properly cleared of root weeds, the need for weeding is minimal. But there are areas where you would like plants or garden design elements to stand out more clearly on an empty surface, and there the surface should be covered with something. Also, the sun and wind do not dry the soil as quickly in mulched areas.
The soil tends to become excessively compacted under the bed fabric, the size of the planting holes must be constantly checked as the plants grow, and under the fabric is also a good place for snails to breed. I would only use the bed fabric under the walkway mulch. For mulching the planting areas, I have used both light gravel spread on a thick layer of newspaper and fine pine bark mulch spread on the soil surface. Both variants have justified themselves over the years, although pine bark mulch has to be added from time to time, it also creates more humus when it decomposes.
soovitused.
Soovitused ajapuududuses aiaomanikule, kes soovib ilusat hooldusvaba aeda: Telli aiakujundusfirmalt sobiv projekt koos teostusega. Või hakka ise jupikaupa nokitsema. Mõtle, kus ja mida oma aias näha tahaksid. Kasuta pildimaterjali, tee kaust meeldinud piltidest, kasuta interneti võimalusi. Kui üldjoontes plaan olemas, löö labidas maasse. Alusta sellistest kohtadest, kus ka vähe tehtud ala annab kohe aiale ilu juurde. Vali sinna taimed. Kaeva oma jupike, nt paar ruutmeetrit, korralikult läbi, äärista peenraservaga ja istuta taimed, multsi.
Kui meeldinud taim peaks üldjoontes mullastikuga sobima ja ta pole just rühmapüsik, ära väetamise pärast muretse, väetada saad vajaduse korral ka üle mitme aasta. Tõenäoliselt selgub, et pole vajagi. Loe erinevatest allikatest multšide kohta, vali enda jaoks parim. Taimi valides kasuta sobivat äppi, et saaksid kiiresti tuvastada taime ja tema kasvunõuded ning saaksid otsustada, kas ta sinu aeda sobib.
recommendations.
Recommendations for the time-poor garden owner who wants a beautiful, maintenance-free garden: Order a suitable project with implementation from a garden design company. Or start tinkering bit by bit yourself. Think about where and what you would like to see in your garden. Use image material, make a folder of the images you like, use the possibilities of the internet. Once you have a rough plan, hit the ground running. Start in such places, where even a little done area immediately adds beauty to the garden. Choose plants there. Dig your patch, e.g. a few square meters, border it with the edge of the bed and plant plants, mulch.
If the plant you like should generally fit the soil and it is not a group perennial, don’t worry about fertilizing, you can fertilize for several years if necessary. It will probably turn out that there is no need. Read about mulches from different sources, choose the best one for you. When choosing plants, use the appropriate app so that you can quickly identify the plant and its growth requirements and decide whether it is suitable for your garden.
Plaanimisest/ From planning
Tee oma aiast pilte ja täienda neid näiteks talvisel ajal oma plaanidega sobivaks kas Microsofti Painti või mingit aiakujundusprogrammi kasutades, kus saad ka taimi lisada, et saada parem ettekujutus tulevasest aiast. Või lihtsalt joonista paberile.
Meie näide aktsenttaimede laikudega alustatud istutusala lõplikest plaanidest:
Take pictures of your garden and make for them additions to your plans in winter, for example, using Microsoft Paint or some garden design program, where you can also add plants to get a better idea of the future garden. Or just draw on paper.
Our example of the final plans for a planting area started with patches of accent plants:
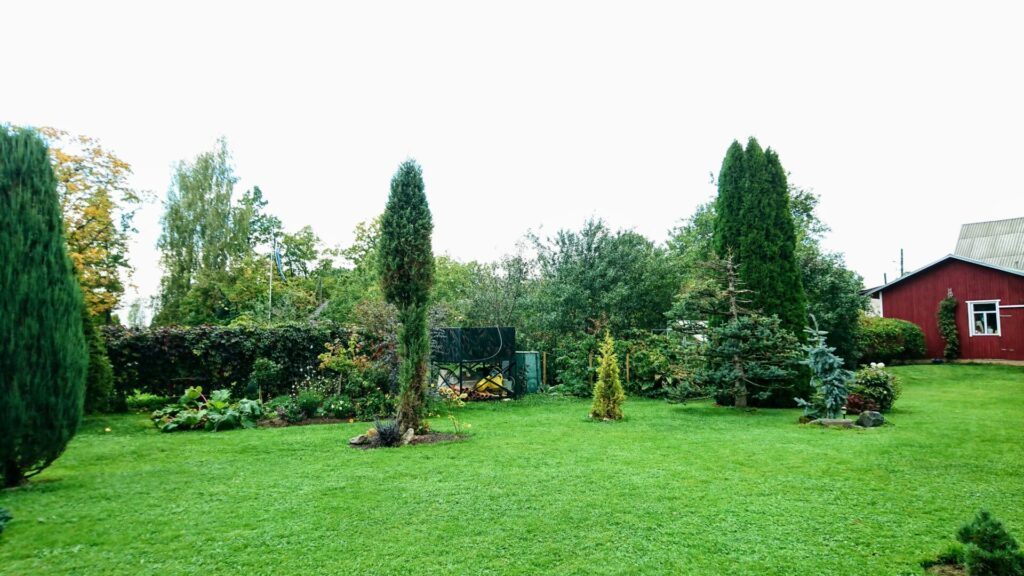
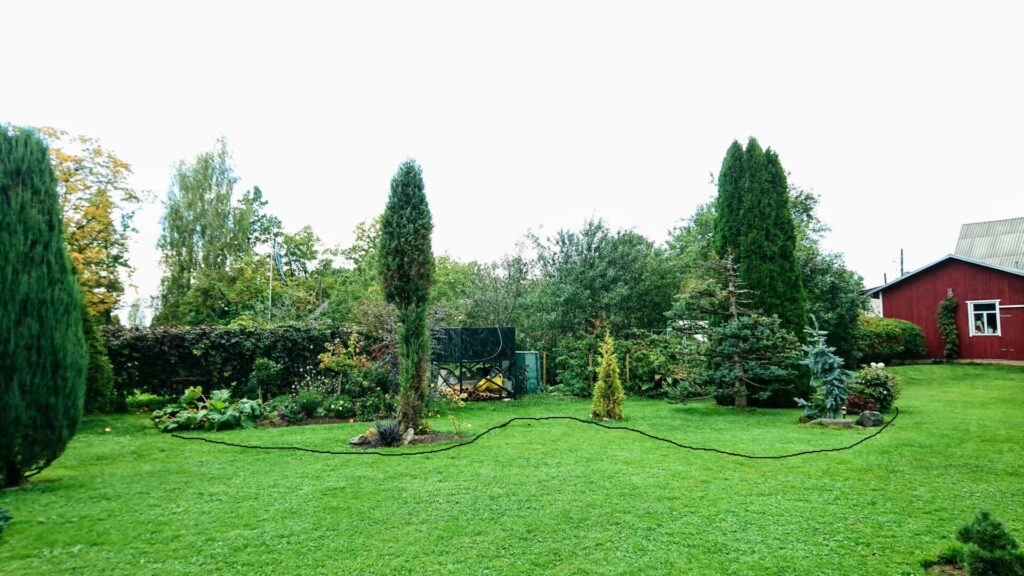
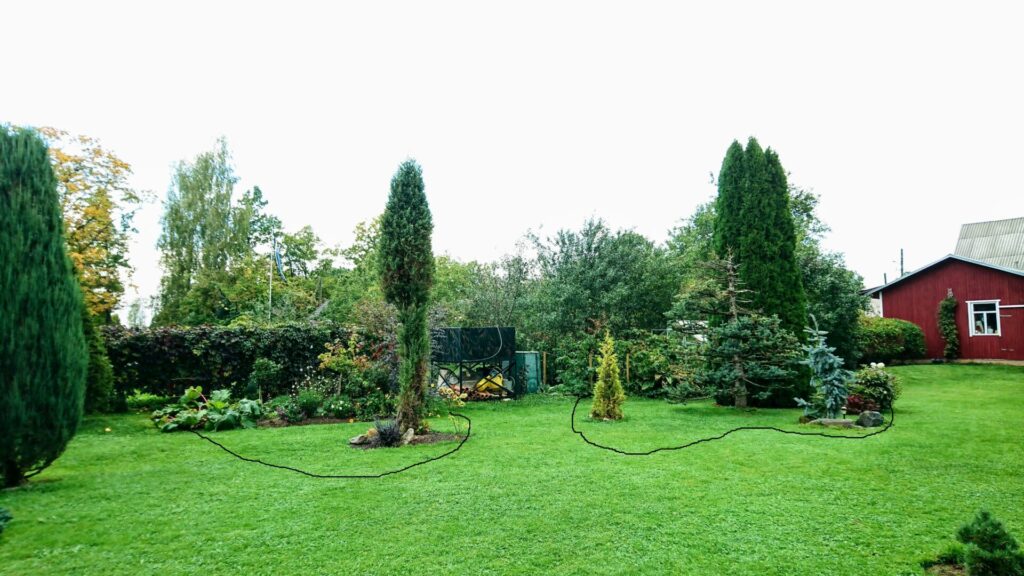
Plaane on mitu, sest kuigi mulle meeldib esimene variant rohkem, on teise variandi plussiks lihtsam ligipääs kastmisveele ja kompostrile. Tore oleks kommentaaridest lugeda, kumb variant teile rohkem meeldib.
Siit ka veel üks soovitus vähest hooldust vajava aia isetegijatele: pole mõtet oma elu ise keeruliseks teha, tuleb enda jaoks läbi mõelda, kuidas aed tulevikus toimida võiks ja selle põhjal otsused teha. Ja kui tulevadki vead… Vead ongi nendest õppimiseks. Ja alati pole vead lihtsalt vead, vaid loomulik areng ja ilusad muutused aias. Head pealehakkamist!
There are several plans, because although I like the first option better, the advantage of the second option is easier access to irrigation water and compost. It would be great to read in the comments which option you like better.
Here’s another suggestion for self-builders of a low-maintenance garden: there’s no point in complicating your own life, you have to think for yourself how the garden could function in the future and make decisions based on that. And if there are mistakes… Mistakes are for learning from them. And always mistakes are not just mistakes, but natural development and beautiful changes in the garden. Good initiative!
